Save Your USB-C Plugs From Oblivion

USB-C as the “One Cable To Rule Them All” has certainly been a success. While USB-A is still around for now, most of us have breathed a hefty sigh of relief with the passing of micro-USB and the several display and power standards it replaces. It’s not without its minor issues though. One of them is that it’s as susceptible as any other cable to a bit of strain. For that, we think [NordcaForm]’s 3D-printed USB-C cable strain relief is definitely a cut above the rest.

Waxing lyrical about a simple 3D printed model might seem overkill for Hackaday, and it’s true, it’s not something we do often, but as Hackaday writers travel around with plenty of USB-C connected peripherals, we like the design of this one. It’s flexible enough to be useful without resorting to exotic filaments, and since it’s available in a few different forms with curved or straight edges, we think it can find a place in many a cable setup. Certainly more of an everyday carry than a previously featured 3D print. If you want to learn more about USB C, we have a whole series of posts for you to binge read.

PLA Gears Fail To Fail In 3D Printed Bicycle Drivetrain

Anyone who has ever snapped a chain or a crank knows how much torque a bicycle’s power train has to absorb on a daily basis; it’s really more than one might naively expect. For that reason, [Well Done Tips]’s idea of 3D printing a gear chain from PLA  did not seem like the most promising of hacks to us.

Contrary to expectations, though, it actually worked; at the end of the video (at about 13:25), he’s on camera going 20 km/h, which while not speedy, is faster than we thought the fixed gearing would hold up. The gears themselves, as you can see, are simple spurs, and were modeled in Fusion360 using a handy auto-magical gear tool. The idler gears are held in place by a steel bar he welded to the frame, and are rolling on good old-fashioned skateboard bearings–two each. (Steel ones, not 3D printed bearings.) The healthy width of the spur gears probably goes a long way to explaining how this contraption is able to survive the test ride.

The drive gear at the wheel is steel-reinforced by part of the donor bike’s cassette, as [Well Done Tips] recognized that the shallow splines on the freewheel hub were not exactly an ideal fit for PLA. He does complain of a squeaking noise during the test ride, and we can’t help but wonder if switching to helical gears might help with that. That or perhaps a bit of lubricant, as he’s currently riding the gears dry. (Given that he, too, expected them to break the moment his foot hit the pedal, we can’t hardly blame him not wanting to bother with grease.)

We’ve seen studies suggesting PLA might not be the best choice of plastic for this application; if this wasn’t just a fun hack for a YouTube video, we’d expect nylon would be his best bet. Even then, it’d still be a hack, not a reliable form of transportation. Good thing this isn’t reliable-transportation-a-day!

Continue reading “PLA Gears Fail To Fail In 3D Printed Bicycle Drivetrain”

Why Stepper Motors Still Dominate 3D Printing

It’s little secret that stepper motors are everywhere in FDM 3D printers, but there’s no real reason why you cannot take another type of DC motor like a brushless DC (BLDC) motor and use that instead. Interestingly, some printer manufacturers are now using BLDCs for places where the reduction in weight matters, such as in the tool head or extruder, but if a BLDC can be ‘stepped’ much like any stepper motor, then why prefer one over the other? This is the topic of a recent video by [Thomas Sanladerer], with the answer being mostly about cost, and ‘good enough’ solutions.

The referenced driving method of field-oriented control (FOC), which also goes by the name of vector control, is a VFD control method in which the controller can fairly precisely keep position much like a stepper motor, but without the relatively complex construction of a stepper motor. Another advantage is that FOC tends to use less power than alternatives.

Using a FOC controller with a BLDC is demonstrated in the video, which also covers the closed-loop nature of such a configuration, whereas a stepper motor is generally driven in an open-loop fashion. Ultimately the answer at this point is that while stepper motors are ‘good enough’ for tasks where their relatively large size and weight aren’t real issues, as BLDCs with FOC or similar becomes more economical, we may see things change there.

Continue reading “Why Stepper Motors Still Dominate 3D Printing”

3D Printing A New Kind Of Skateboard That Is Ultimately Unsafe

Skateboards were organically developed in the 1940s and 1950s; 30 years would then pass before the ollie was developed, unlocking new realms for skaters dedicated to the artform. The advent of powerful batteries and motors would later make the electric skateboard a practical and (un?)fashionable method of transport in more recent years. Now, [Ivan Miranda] is pushing the cutting edge of skateboarding even further, with an entirely weird build of his own design.

The build was inspired by one-wheels, which [Ivan] considers fun but ultimately too dangerous. Most specifically, he fears crashing when the one-wheel is tilted beyond a critical angle at which the motor can restore it to a level  heading. His concept was to thus create a two-wheeled board that is nonetheless controlled with the leaning interface of a one-wheel.

The frame is assembled from a combination of 3D-printed brackets and aluminium extrusion. The rider stands on a platform which rides on rollers on top of the frame, tilting it to control the drive direction of the board. Detecting the angle is handled by an Arduino Due with an MPU6050 IMU onboard. The microcontroller is then responsible for commanding the speed controller to move the board. Drive is from a brushless DC motor, hooked up to one of the wheels via a toothed belt. Power is courtesy of three power tool batteries.

Early testing showed the design to be a bit of a death trap. However, with refinement to the control system code and an improved battery setup, it became slightly more graceful to ride. [Ivan] notes that more tuning and refinement is needed to make the thing safer than a one-wheel, which was the original goal. We’ve seen some other great builds from [Ivan] before, too. Video after the break.

Continue reading “3D Printing A New Kind Of Skateboard That Is Ultimately Unsafe”

3D Printing A Cheap VR Headset

The modern era of virtual reality really kicked off in earnest just over a decade ago, when the Oculus Rift promised 3D worlds beyond your wildest dreams. Since then, nobody’s been able to come up with a killer app to convince even a mild fraction of consumers to engage with the technology. Still, if you’re keen to tinker, you might like to make your own headset like [CNCDan] has done.

The build is based almost entirely on 3D-printed components and parts sourced from AliExpress. It offers 2880x1440p resolution, thanks to a pair of square 1440×1440 LCD displays, one for each eye, paired with a couple of 34 mm lenses. The headset has adjustable interpupiliary distance so you can dial the view in to properly suit your eyes. The 3D-printed housing is designed to be compatible with headrest pads from the HTC Vive Pro for comfort’s sake. Head tracking is also available, with the inclusion of an IMU and an Arduino onboard. [CNCDan] apparently put the build together for under $150, which is not bad compared to the price of a commercial off-the-shelf unit. Files are on Github for the curious.

[CNCDan] reports good results with the DIY headset, using it primarily with his racing simulator setup. He has had some issues, however, with his LCD screens, which don’t properly run at a 90 Hz refresh rate at full resolution, which is frustrating. It’s an issue he’s still looking into. We’ve seen some other neat VR builds over the years, too. Video after the break.

Continue reading “3D Printing A Cheap VR Headset”

3D Print Smoothing, With Lasers

As anyone who has used an FDM printer can tell you, it’s certainly not the magical replicator it’s often made out to be. The limitations of the platform are numerous — ranging from anisotropic material characteristics to visual imperfections in the parts. In an attempt to reduce the visual artifacts in 3D prints, [TenTech] affixed a small diode laser on a 3D printer.

Getting the 1.5 watt diode laser onto the printer was a simple matter of a bracket and attaching it to the control board as a fan. Tuning the actual application of the laser proved a little more challenging. While the layer lines did get smoothed, it also discolored the pink filament making the results somewhat unusable. Darker colored filaments seem to not have this issue and a dark blue is used for the rest of the video.

A half smoothed half unprocessed test print
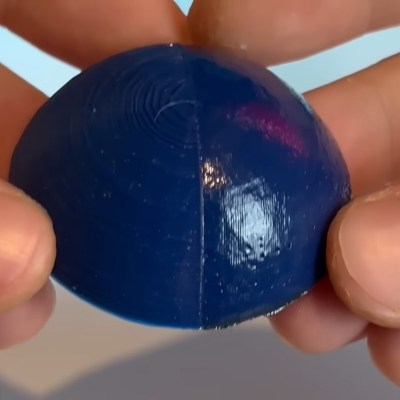
The smoothing process begins at the end of a 3D print and uses non-planar printer movements to keep the laser at an ideal focusing distance. The results proved rather effective, giving a noticeably smoother and shiner quality than an unprocessed print. The smoothing works incredibly well on fine geometry which would be difficult or impossible to smooth out via traditional mechanical means. Some detail was lost with sharp corners getting rounded, but not nearly as much as [TenTech] feared.

For a final test, [TenTech] made two candle molds, one smoothed and one processed. The quality difference between the two resulting candles was minimal, with the smoothed one being perhaps even a little worse. However, a large amount of wax leaked into the 3D print infill in the unprocessed mold, with the processed mold showing no signs of leaking.

If you are looking for a bit safer of a 3D print post-processing technique, make sure to check out [Donal Papp]’s UV resin smoothing experiments!

Continue reading “3D Print Smoothing, With Lasers”

Improved 3D Printer Cannibalizes Two Older Printers

In the late 2010s, the Ender 3 printers were arguably the most popular line of 3D printers worldwide, and for good reason. They combined simplicity and reliability in a package that was much less expensive than competitors, giving a much wider range of people access to their first printers. Of course there are much better printers on the market today, leaving many of these printers sitting unused. [Irbis3D] had an idea that with so many of these obsolete, inexpensive printers on the secondhand market, he could build something better with their parts.

The printer he eventually pieces together takes parts from two donor Ender printers and creates a printer with a CoreXY design instead of the bedslinger (Cartesian) design of the originals. CoreXY has an advantage over other printer topologies in that the print head moves in X and Y directions, allowing for much faster print times at the expense of increased complexity. There are some challenges to the design that [Irbis3D] had to contend with, such as heating problems with the extruder head that needed some modifications, as well as a resonance problem common with many printer designs which can generally be solved by replacing parts one-by-one until satisfactory prints are achieved.

Of course, not all of the parts for the new printer come from the old Ender printers. The longer belts driving the print head needed to be ordered, as well as a few other miscellaneous bits. But almost everything else is taken from these printers, which can be found fairly cheaply on the secondhand market nowadays. In theory it’s possible to build this version for much less cost than an equivalent printer as a result. If you’re looking for something even more complicated to build, we’d recommend this delta printer with a built-in tool changer.

Thanks to [BusterCasey] for the tip!

Continue reading “Improved 3D Printer Cannibalizes Two Older Printers”